Whether you’re laying the foundation for parking lots, driveways, or any other heavy-load-friendly surface, having the right materials can make or break the longevity of your project.
Without proper soil erosion measures, your foundation can become uneven over time, making it a potential hazard for vehicles, especially larger utility-style vehicles.
Thankfully, applying a highly-effective geotextile road fabric is a simple, affordable, and reliable way to save yourself time and money on costly maintenance expenses over the long term.
And the best part?
You can apply this woven fabric in just 6 easy steps, no matter what your experience level looks like.
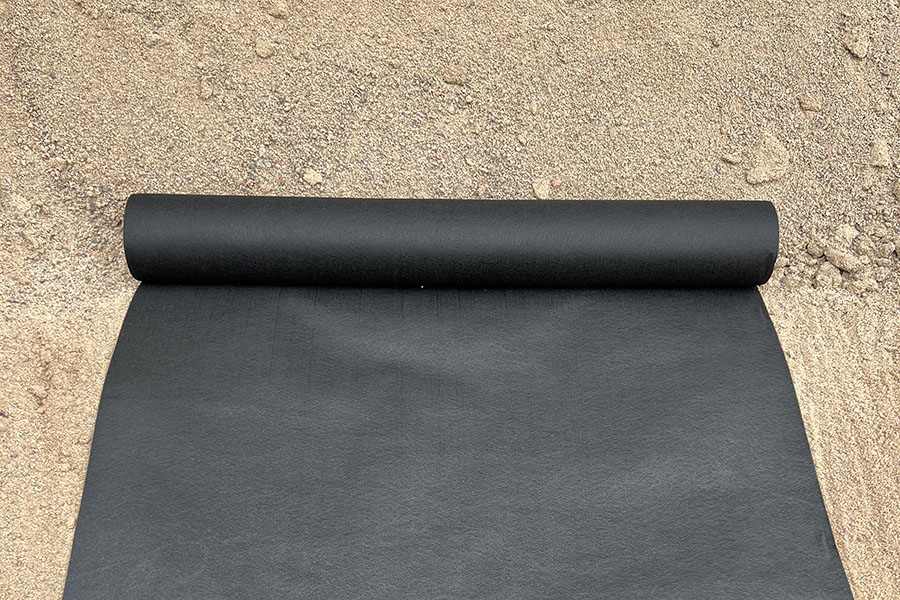
What is Geotextile Fabric?
Woven geotextiles are a type of filtration and drainage support system that construction professionals use to create long-lasting foundations for roads, parking lots, driveways, and every driveable surface in between.
These specially made fabrics feature tiny hexagon-shaped designs that allow soil particles, water, and other elements to seamlessly be pushed out through the fabric, without causing a disruption to your surface.
Unlike other erosion control products, geotextile erosion control doesn’t require any additional filtration systems or expensive accessories. Instead, these powerful rolls of the fabric provide enough tensile strength to support heavy loads and eliminate erosive materials all at once.
What are the benefits of using Geotextile Fabric?
Besides being a great method for soil erosion control, woven geotextiles come with several other benefits that can help your project withstand the test of time, even in harsh weather conditions.
It’s Strong
With high tensile strength of 2,246 lbs and a puncture rate of 404 lbs, this type of driveway fabric can easily be used in areas where heavy vehicles will be traveling frequently.
That’s because geotextile road fabric is traditionally made from industrial-strength polypropylene, which is well known for durability in major construction projects.
It’s Affordable
On average, geotextile road fabric is significantly more cost-effective than other soil erosion control products and can be purchased by the roll to meet your project’s needs.
This means you can spend less money on materials you don’t need or cut costs on other maintenance requirements.
It’s Easy To Install
One of the best parts of working with woven geotextile road fabric is how simple they are to install for any given area. This makes them a top choice for professional contractors and D.I.Y. builders alike.
Here’s how to apply Geotextile Fabric in 6 steps
Step 1) Clear Your Area
Before you can begin installing your driveway fabric, it’s important to have a clean slate to work with.
This means you’ll need to remove any lingering debris in your work area that may cause your surface to become uneven, including trees, bushes, rocks, and other natural elements.
Depending on the size of your lot, you may require some clearing equipment to help you get the job done fast, so you can get back to laying your foundation.
Step 2) Level Your Surface
Having a lasting parking lot or driveway surface starts with having a completely even foundation.
Once you’ve removed any debris from your site, be sure to follow up by leveling out your work area.
You can do this using handheld construction tools or with ride-on leveling equipment.
Step 3) Roll Out Your Fabric
Next, you’re ready to lay out your geotextile road fabric across your entire work area.
However, that doesn’t mean you should rush through this process. To ensure the success of your soil erosion control, be sure to tightly spread your fabric from end to end, leaving as few air gaps beneath the surface as possible.
This will help you avoid an inconsistent surface level and potential repairs later on.
Step 4) Double Check Your Coverage
Once your fabric has been completely rolled out, you’ll need to pay extra attention to any edges or overlapping areas on your surface.
For example, areas, where the fabric may have a gap, can lead to a decrease in its ability to effectively filter out water and soil particles, which can eventually lead to the need for more maintenance.
We recommend overlapping your fabric lines by at least 3 – 4 inches, so you don’t have to worry about your fabric becoming loose over time.
Step 5) Secure Your Fabric
After your fabric is fully in place, you’ll need to secure it before adding any fill on top.
The easiest methods for securing geotextile fabric are by using heavy-duty staples, nails, pins, or other construction materials.
When you do this, be sure to follow along the edges of your fabric, as well as any overlapping areas to provide maximum stability for your final project.
Step 6) Add Your Fill Materials
Finally, you’ll be ready to cover your geotextile road fabric with the fill of your choosing, whether that be gravel, dirt, or other materials.
As you add fill over the top of your fabric, follow along behind it with some sort of leveling device to create a smooth, even surface that will last for years to come.
Need help finding the right Geotextile Fabric for your project?
No matter what your erosion control needs are, the team at BaseCore is here to help.
We specialize in providing industry-leading construction solutions for projects of all shapes and sizes, including our signature Geocell bases and geotextile road fabric that have been carefully designed to give you the best sediment control and long-term durability at an affordable price.
Connect with us to learn more about how our products can help you bring your next project to life today.