Whether you’re geocell installation a new driveway, shed base, temporary access road, or you’re just looking to enhance your erosion control measures, starting a new construction project can seem like an overwhelming process.
Thankfully, you don’t have to spend a fortune on complicated bases that take an expert skill level to install.
With our BaseCore GeoCell panels, you can get the erosion-proof, heavy-load approved foundation you deserve, all with just a few simple installation steps designed for construction professionals and D.I.Y enthusiasts alike.
In this guide, we’ll show you exactly how to install your GeoCell base panels, so that you can get the most out of your next project in a fraction of the time.
Step 1) Clear & Excavate Your Space
You can think of your base area as a blank canvas, which is why it’s so important to make sure that you’ve completely cleared the space before laying your foundation.
To begin, you should thoroughly remove any debris, tree limbs, bushes, or other obstacles that could cause your base to have an uneven surface.
After that, you can dig around 3 – 4 inches into the ground, allowing your GeoCell panels to lay completely flat across the surface.
Step 2) Lay Any Additional Fabrics
Depending on where you’re laying your base, you may want to consider adding an extra layer of protection between the ground and your geocell installation panels.
For example, Geotextile road fabrics are a great way to prevent weeds and other invasive elements from disrupting the surface of your base and are relatively affordable and easy to find.
Simply roll out your fabric evenly across the base area, using durable nails to secure it into place.
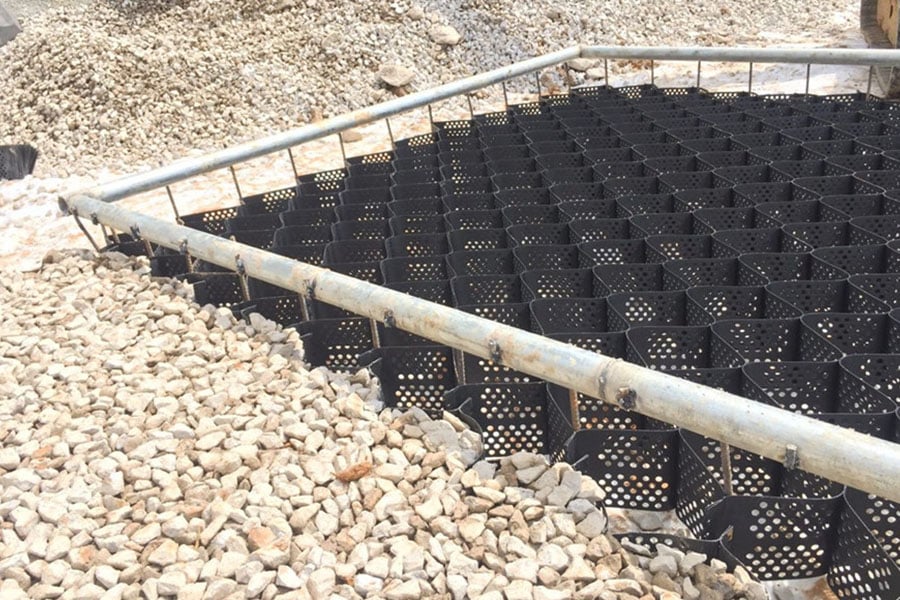
Step 3) Install Your GeoCell Panels
Next, you’ll be ready to install your geocell installation panels.
To do this, you’ll want to measure the length of your space and trim your panels to an appropriate length, so that you can avoid any sharp edges pointing out from beneath the surface.
Then, you can begin interlocking your geocell installation panels by laying them out without connectors across your entire surface area, ensuring that there are no gaps in your base coverage before you complete the installation process.
Step 4) Secure With Stakes
Once you’ve trimmed and measured your geocell installation panels, you can secure them into place using the rebar stakes included in your order.
At BaseCore, each of our geocell installation panels comes with 4 – 6 ½ rebar stakes that have been designed to be completely compatible with your base, using nothing but a small hammer to ensure that they’re fully secured and in place.
Step 5) Add Your Infill Materials
Finally, you’re ready to add your surface infill materials.
And regardless of whether you choose to use gravel, angular stones, or some other form of natural material, you can rest assured that your geocell installation panels will provide plenty of erosion control and sufficient water drainage to keep your surface perfectly even for many seasons to come.
Typically, we recommend adding at least 2 inches worth of material to the top of your GeoCell base, so you have plenty of support for heavy vehicle loads.
Need More Help Getting Started?
The BaseCore team is committed to making your next construction project as seamless and stress-free as possible.
If you have any questions about the number of panels needed for your base, tips on easy installation, or any other concerns about the longevity of your project, we’re standing by to help at a moment’s notice.
Connect with our team to learn more about our innovative GeoCell bases today.